C# Programming > Windows Forms
C# Non-Rectangular Windows Form
Region
Irregular Shape C# Form
Creating a non-rectangular shaped Windows Form in C# can be of infinite uses...
Once upon a time, before .NET Framework 2.0, irregular shaped Windows Forms in C# could only be created by using complicated API calls. Luckily starting with C#.NET 2.0, creating non-rectangular shaped Forms is extremely simple programming. One need only modify a single Form property: Region.
Let's go over how to modify the Region property to get a non-rectangular shaped Windows Form with only pure C# code...
Creating the Form Shape
All non-rectangular Windows Forms in C#, no matter how they are created, need a shape to reference. For our example you are going to use a Bitmap. Whether you display it on the Form as background or not is up to you. Most of the time, as in this example, the image will also serve as a background image.
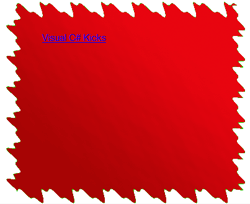
I created an abstract shape using Photoshop (included in the project files at the bottom of the page). Feel free to create one with any image creation software, or even with C# itself if that works for you.
The important concept here is, create a solid background with a color that contrasts the rest of the image as much as possible. The contrasting color will be the one left out when we generate our irregular shaped Form.
Alternately, the good thing about Regions in C# is you can simply create the mask. In fact, if your particular non-rectangular Form does not need a background image, a mask by itself will do. Displaying the mask is not necessary to make the source code reshape the Form.
A mask is a black and white image (no gray) that shows the shape of the Form. For example, a white circle on a black background would be a mask to a circle Form.
Applying the Region
Once you have the shape image reference we can move ahead and apply the image to the shape of the Windows Forms with the Form's Region property. The easy part is this:
this.Region = [Region object]
Simple C# code right? The tricky part of applying the image to the region is creating the Region object. The basic outline is:
- Scan the Bitmap for the contrast color
- Add the color's location as a Rectangle to a GraphicsPath object
- Create a custom shaped Region from the GraphicsPath object
There are many ways to scan a Bitmap with C#. That is not the focus of this article, the focus is creating an irregular-shaped Form. But very briefly, the way to scan the image is to use two nest for loops to read every pixel and compare it to the contrast color.
In the project I included two C# functions to scan the Bitmap. One uses GetPixel, which is clean but slow. The second uses Pointers to directly access the Bitmap's bytes. It is more complex but a lot faster. For more information read the fast image processing article.
I would recommend using the slow one to understand the concept and the fast one for the final code. A custom shaped Form needs to load as fast as possible.
So for every pixel that does not match the contrast color, we add it to the GraphicsPath as a new Rectangle(x, y, 1, 1).
The Region object is created from the C# GraphicsPath with one simple line: new Region(path).
Then apply it to the Form like I wrote about above and bam, you got a custom shaped Form.
Alternate Method - Transperancy
A downside to this method is that it can take considerable CPU power and time to process the background image into a Region. Don't get me wrong, in most cases it will not be a big deal and the custom shaped Windows Form will look amazing.
But just in case you want a simpler and faster method to apply an image to Form shape, check out the C# Irregular Shape Windows Form - Transparency C# article.